


Overview
The Sibaya Metal Security Gate is a simple, lockable solution for homes and small businesses. Combining strong steel construction with a protective finish, it’s designed to provide dependable day-to-day security.
*For larger or higher-risk sites, Xpanda recommends our custom welded security gates for maximum strength.
Top Features
- Width: 770mm | Height: 1950mm
- Mild steel, zinc plated + epoxy coated
- Type: Fixed swing gate
- Lockable
Key Strengths
- Strong and Secure:
Durable steel construction for reliable entry-point protection. - Lockable Design:
Prevents unauthorised access while providing peace of mind. - Weather-Resistant Finish:
Coating ensures long service life in NZ conditions. - Simple Operation:
Fixed swing gate design is easy to use and install.
Applications
- Homes and side entrances
- Light commercial access doors
- Utility areas
What’s Included
- Sibaya gate panel (steel, coated finish)
- L302 Lock (Lockable from both sides)
- V Hinges
- Lock Protection Plate
- Lock Keep
- Fixings
- Instruction guide
Sibaya gate panel (steel, coated finish)


- Panel Height: 1950mm
- Panel Width: 770mm
- Panel Thickness: 25mm
L302 Lock (Lockable from both sides)


V-Hinges

- Hinge Width: 60mm
- Hinge Height: 75mm
- Hinge Thickness: 1mm
Lock Protection Plate

- Lock Protection Plate Width: 165mm
- Lock Protection Plate Height: 50mm
- Lock Protection Plate Depth: 25mm
- Lock Protection Plate Thickness: 1mm
Lock Keep

- Lock Keep Width: 25mm
- Lock Keep Height: 130mm
- Lock Keep Depth: 25mm
Fixings


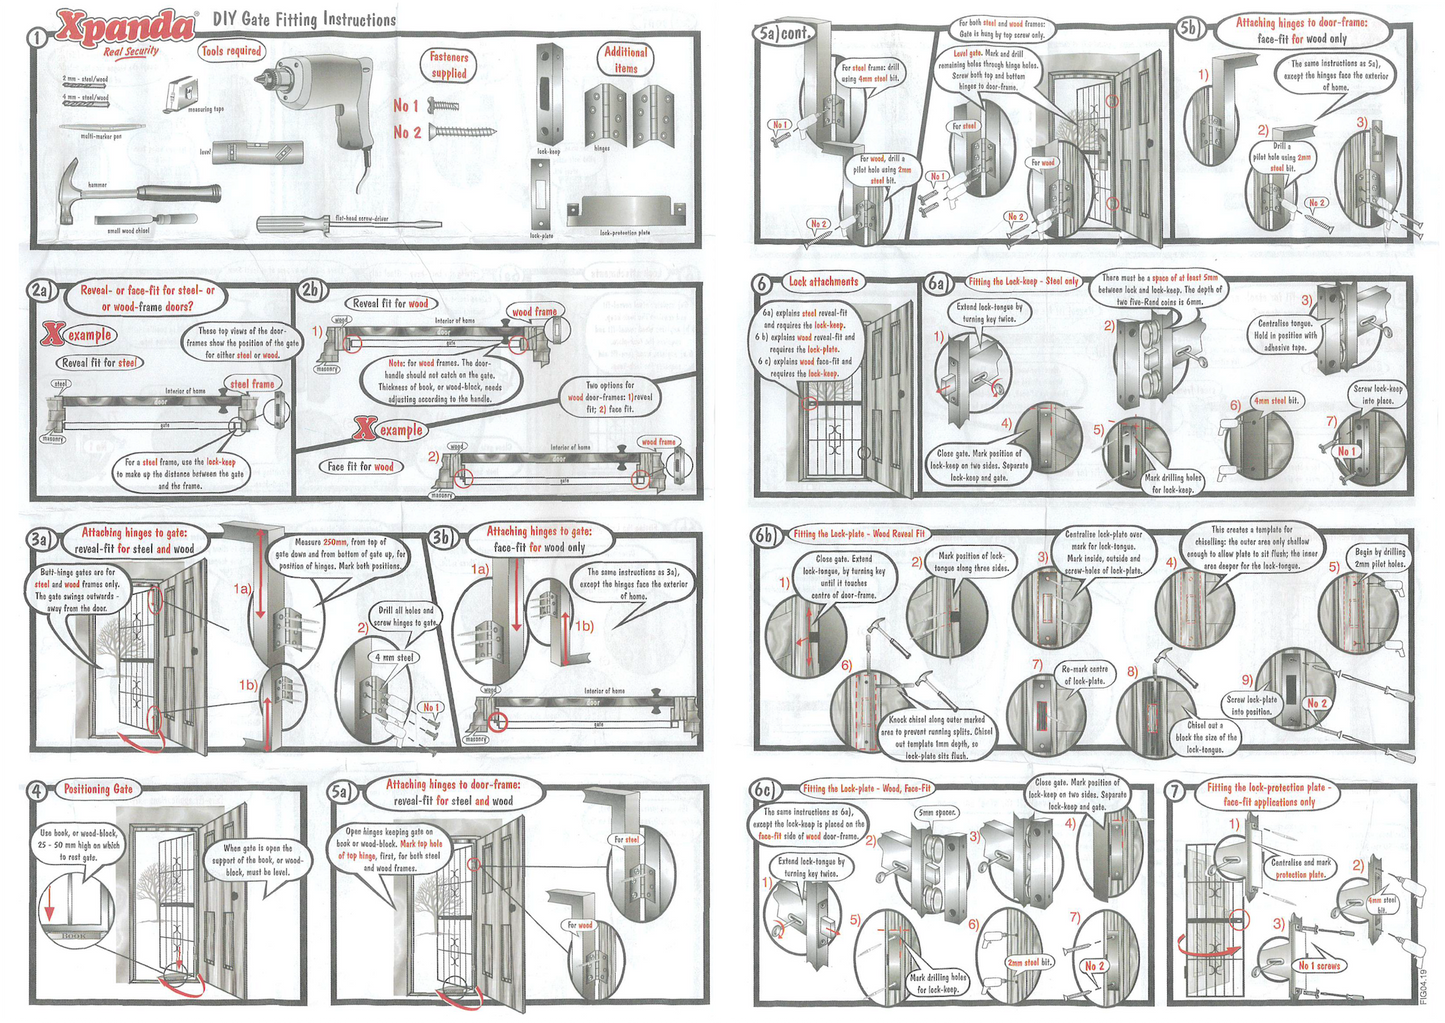
Instruction guide

Please click here to download the pdf version.
Installation Guide
Click here to download the installation guide!
CUSTOM ORDER?
