How to Install Fixed Swing Security Gates
Is it difficult to install your security gates?
This is one of the most common questions we receive, and it's very, very valid.

While our gates come with instructions and are often purchased by customers who are confident in their DIY skills, the installation process can still feel overwhelming or time-consuming.
AND if we can help reduce some of the mental burden and assist you in making a more informed decision, we’re here for you.
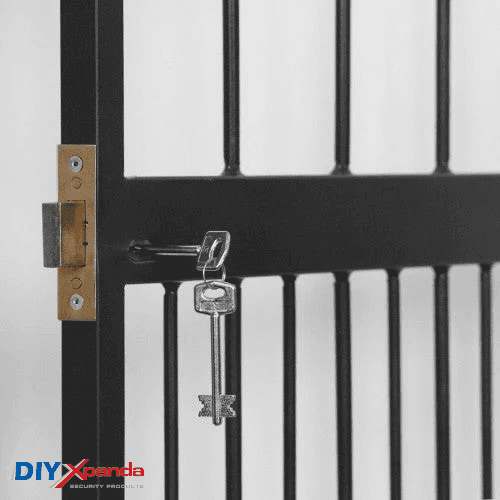
In this article, we focus on our fixed swing security gates, using our Renaissance security gates as a reference point. Please note that detailed instructions may vary depending on the gate size, door frame, and whether you are fitting it into masonry or wood. Be sure to refer to the specific instructions supplied with your gate.
<Fixed Swing Security Gates>


If you are looking to install our retractable gate, please refer to this article with a detailed installation guide.
<Retractable Security Gates>


<index>
Step 1. Measure the Width of the Door Frame
Step 2. Screw Hinges Through the Gate
Step 3. Set Up Lock-Keep, Lock Tongue & Hinges
Step 4. Fit Gate Into Door Frame (Masonry or Wood Fitment)
Step 5. Adjust Gate Position (Reach & Fitment Type)
Step 6. Check Hinges and Gate Level
Step 7. Attach Gate to the Frame
Step 8. Mark & Fix Lock-Keep
Step 9. Set & Adjust Lock Tongue
Step 10. Insert Cylinder and Final Lock Assembly
Step 11. Fit the Lock Protection Plate
🛠️ Tools Required
🖊️ Multi marker pens
📏 Measuring tape
📐 Level
🛠️ Multi-purpose drill
🔩 Drill bits (2, 4, 6, 8, 10mm – Steel/Wood)
🧱 Masonry drill bits (6mm, 10mm)
🔧 Screwdrivers (Star & Flat head)
🔧 Ring spanners (10mm & 13mm)

Step 1. Measure the Door Frame Width
Use a measuring tape to get the frame width where the gate will be installed.
Make sure you measure inside the door frame. 🚪
Step 2. Attach Hinges to the Gate
a. Screw the hinges into the gate.
b. Do not fully tighten them yet — just enough to hold. 1
c. Adjust the hinges to align with the door frame. 📐

Step 3. Set Up Lock-Keep, Lock Tongue, and Hinges
a. Centralize the lock-keep over the lock tongue.
b. Use adhesive tape to hold the lock-keep in place.
c. Ensure there is at least 5mm gap between the lock and lock-keep.
d. Connect male to female hinges on top, center, and bottom.
e. Hold them in place with tape.


Step 4. Fit Gate Into Door Frame
Place the gate into the door frame. 🚪
- For masonry: install the gate parallel to the frame. 🧱
-
For wood: install the gate perpendicular to the frame. 🪵

Step 5. Adjust Gate Position
Adjust female hinge bolts to widen or narrow the gate’s reach. 🔧
- Reach for masonry fitment: 885mm–930mm. 📏
- Reach for wood fitment: 865mm–910mm. 📏

Step 6. Tighten Hinges & Check Level
a. Tighten all female hinge bolts.
b. Use a spirit level or a 30mm-thick book to check alignment. 📐
c. Mark the top, center, and bottom hinge positions. ✏️
d. Remove the gate carefully.

Step 7. Attach Gate to the Frame
a. Drill holes at the hinge markings.
b. Insert and tighten the hex bolts. Use a motion like opening a bottle top to secure bolts.
Step 8. Install the Lock-Keep
a. Ensure the lock-keep is still taped to the gate.
b. Close the gate and mark the lock-keep position.
c. Remove the gate and the lock-keep.
d. Drill holes on the marks and bolt the lock-keep into place. 🔩
Step 9. Adjust Lock Tongue Direction
Rotate the tongue so the angled side faces the closing direction.
If the flat side hits the lock-keep, the gate will not close. ⚠️

Step 10. Fine-Tune Lock Cylinder 🔑
a. Remove the lock from the gate.
b. Turn the key about 10° until the center bar is flush.
c. Insert the cylinder into the gate lock.
d. Turn the key until the tongue extends and screw appears.
e. Remove the screw and pull out the tongue.
f. Rotate the tongue to the correct direction.
g. Reinsert the tongue and secure it with the screw.
h. Remove the cylinder again.
i. Reinstall the lock in the gate.
j. Ensure the center bar is flush and the tongue retracts properly.
k. Fix the lock using screws.


Step 11. Install Lock Protection Plate
a. Centralize the plate and mark the holes.
b. Drill holes on the marks and screw and secure the protection plate.

Conclusion✅
1. Double-check all measurements – door frame width, hinge positions, and reach alignment.
2. Make sure you’ve correctly chosen the fitment type.
3. Confirm all hinges are tightened securely and gate is properly aligned and level.
4. Test the lock mechanism – the lock tongue should align cleanly with the lock-keep and retract fully with the key.
5. Secure the lock protection plate in position using marked points. Ensure smooth operation without scraping, dragging, or misalignment.🔚
>>>
If you are looking for custom-made steel security gates and doors, please consult with Xpanda Security for tailored solutions that meet your specific needs.
They offer a free quote and measurements (in the Auckland region).
Stay safe!